
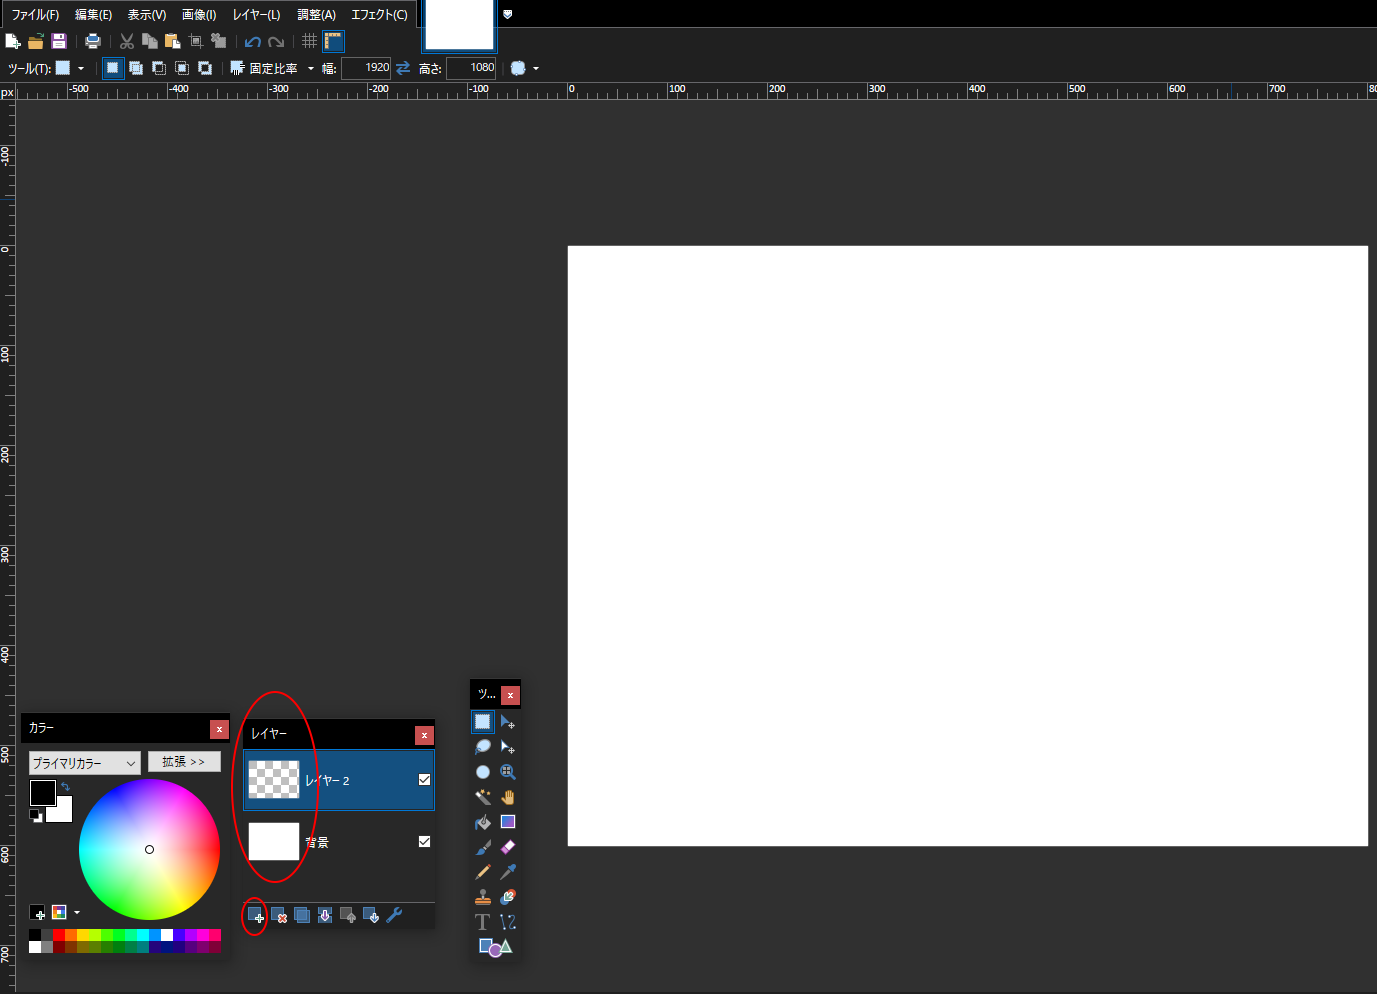
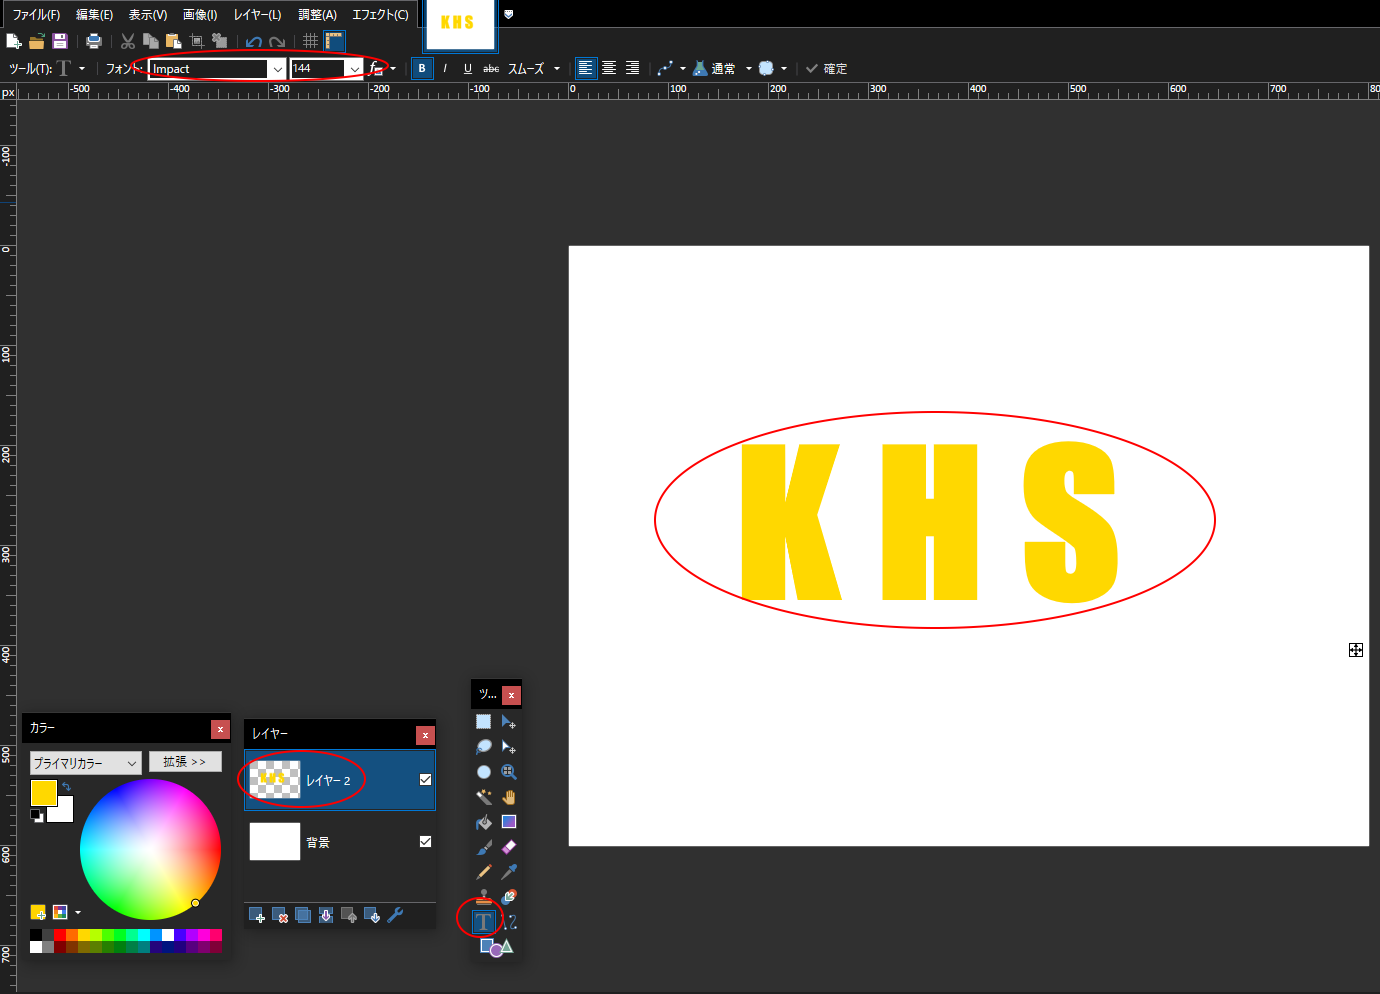
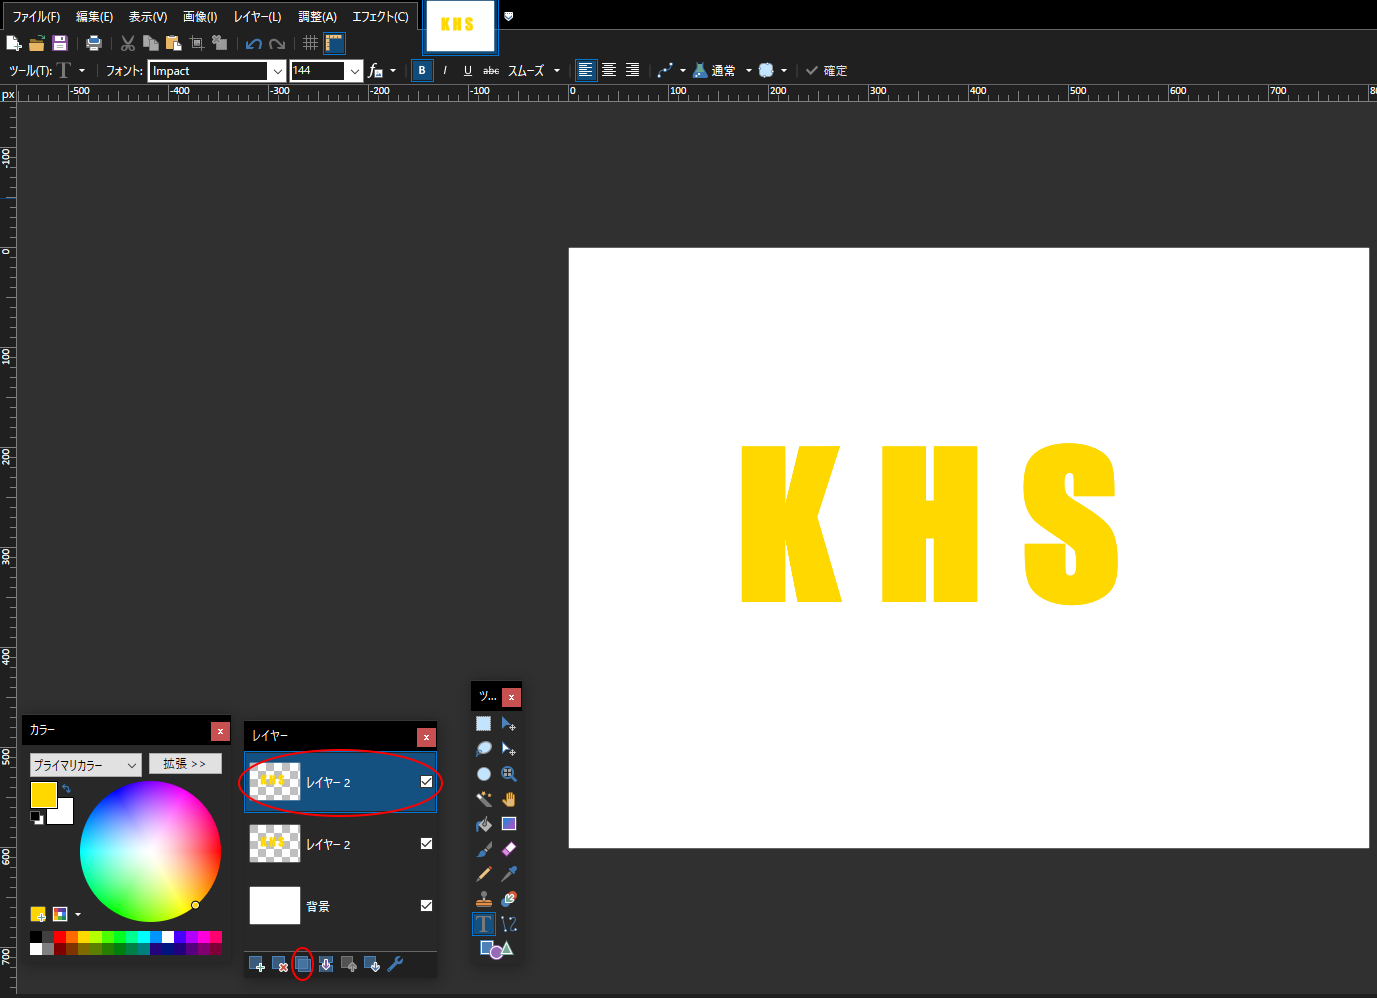


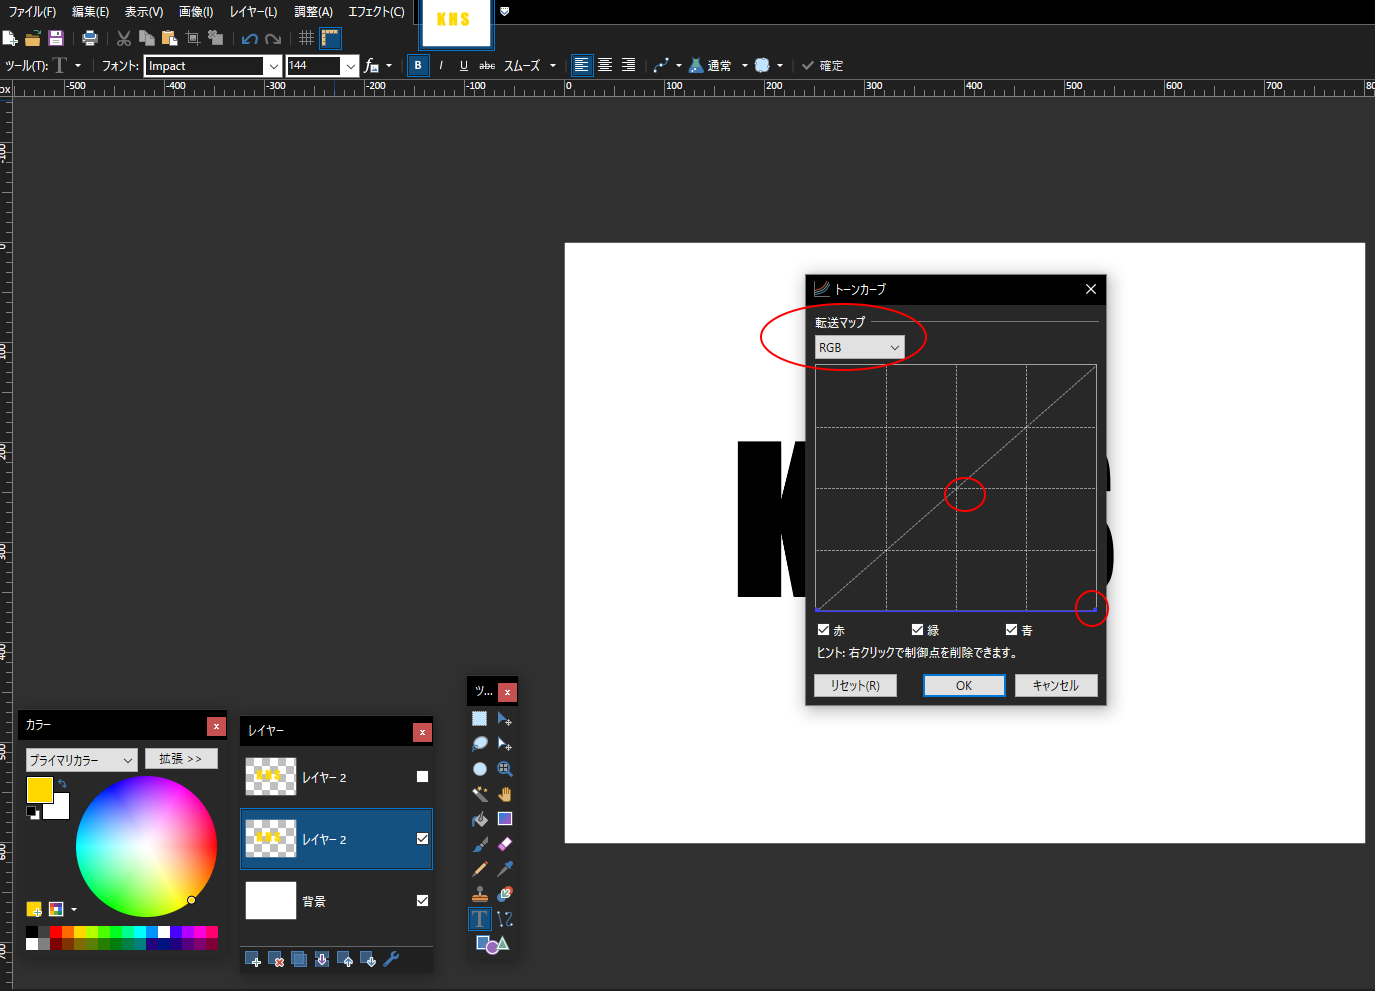
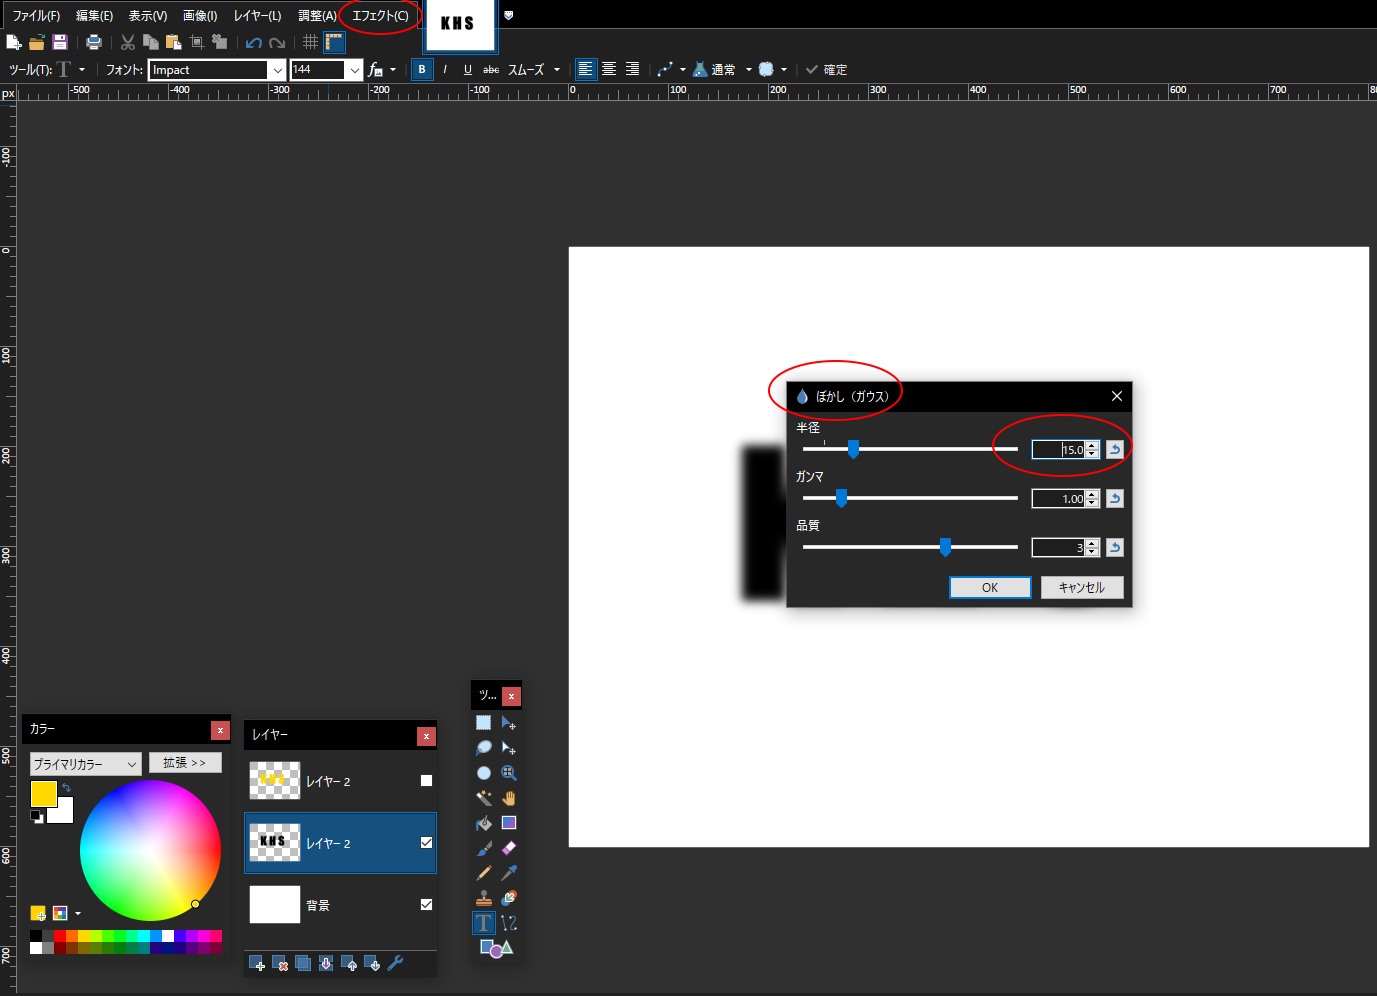
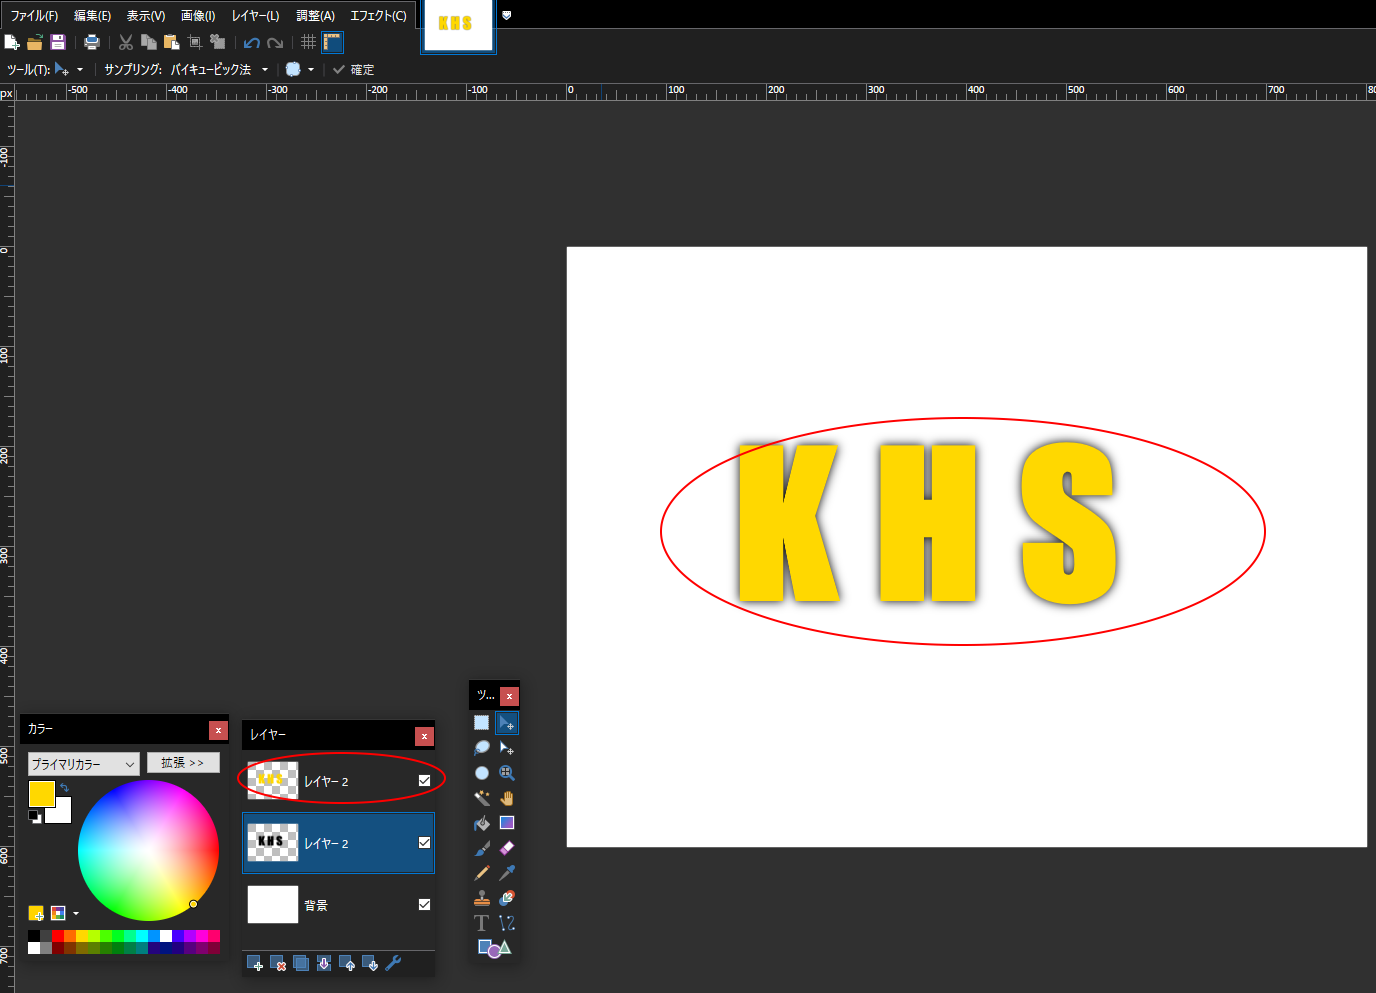
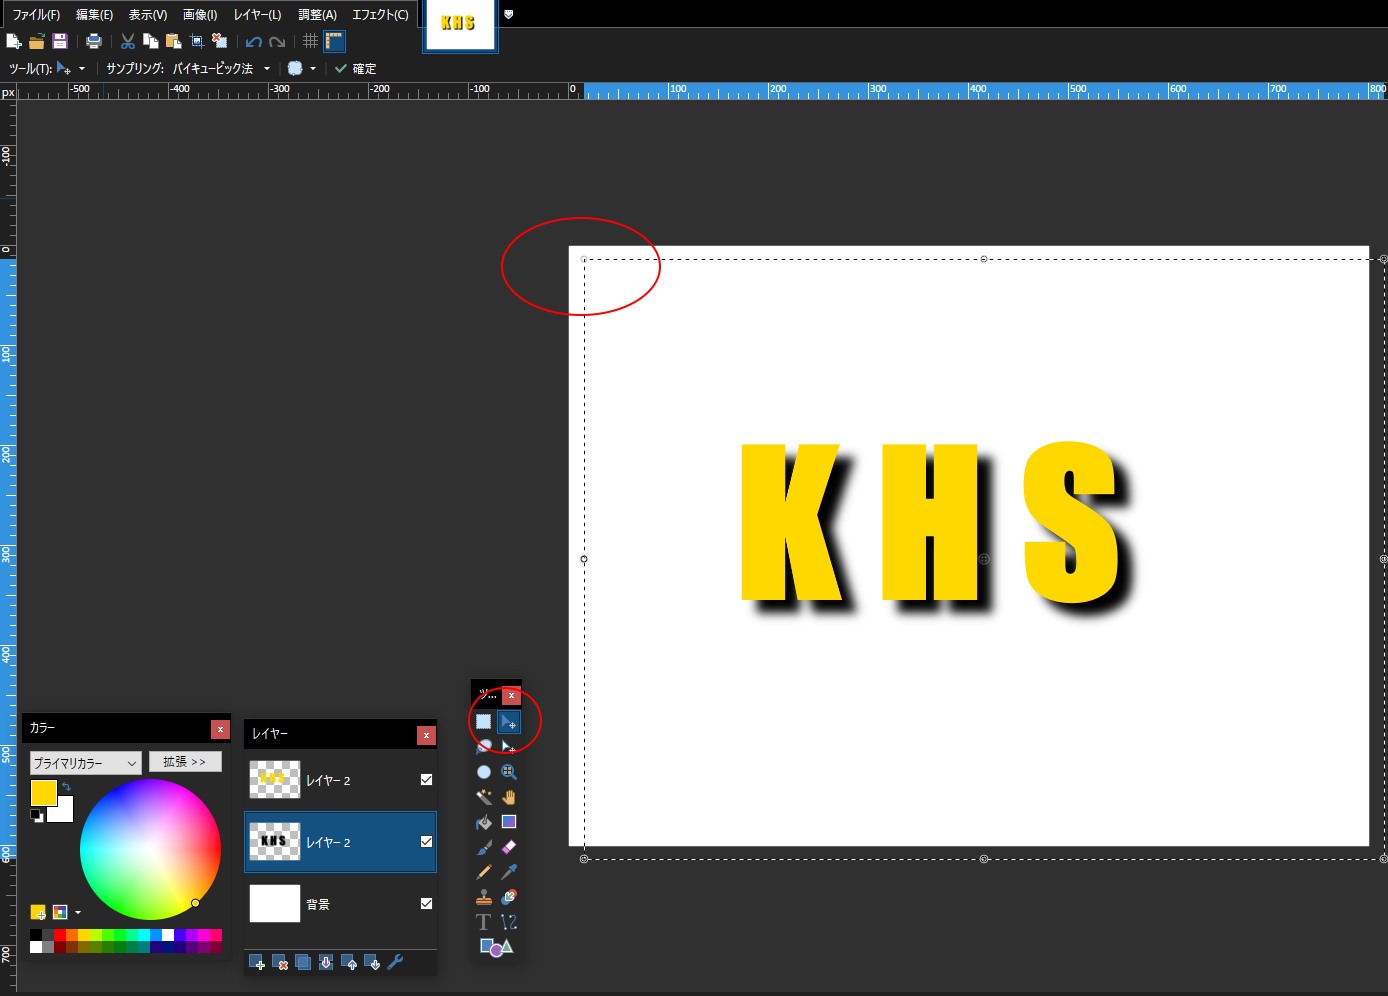

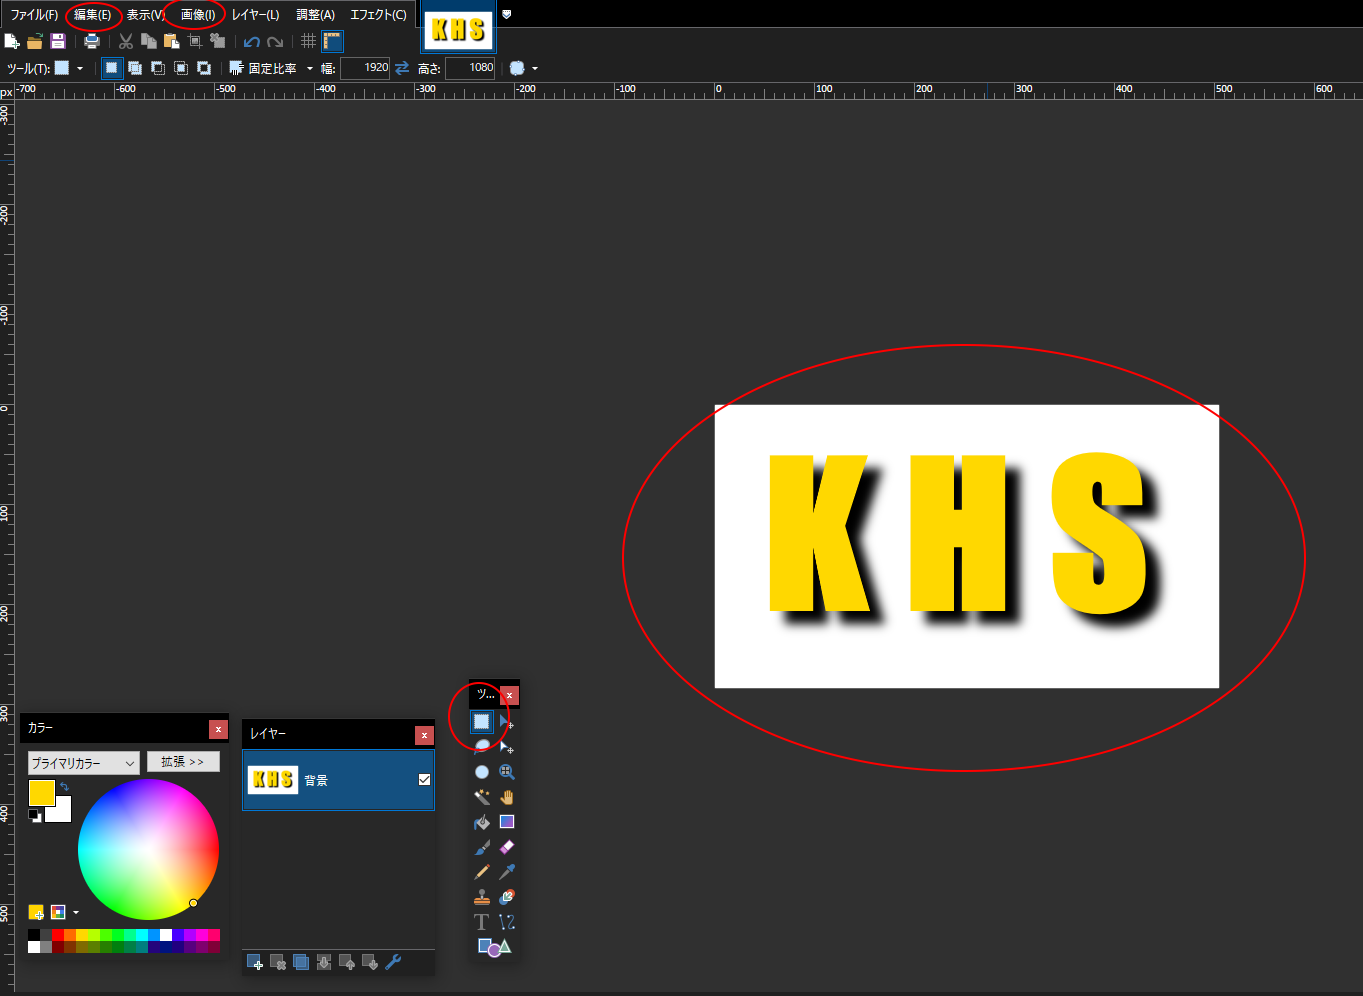
Paint.netの新Verでの影付き文字の作成です。
MENU等に変更・追加があったので、新しいVerでの作成手順の紹介です。
詳細は写真の注釈を御覧ください。
透過PNG作成の場合は背景を削除して結合してください。
MENU等に変更・追加があったので、新しいVerでの作成手順の紹介です。
詳細は写真の注釈を御覧ください。
透過PNG作成の場合は背景を削除して結合してください。
わかお かずまさ
VegaSystems
📷📷📷📷📷📷
#LAN_PRO
#Bloguru
#kuma_ichinomiya
#VegaSystems
#photography_Ichinomiya
 yumirou
  プラン
プラン  dote
dote
If you are a bloguru member, please login.
Login
If you are not a bloguru member, you may request a free account here:
Request Account